I have these V neck t-shirts that I got from Forever 21 a million years ago and I am obsessed with them. I'm glad I had the forethought to buy 4 of them but I wish I'd bought 50. They fit like a glove, are the perfect length, have the perfect neckline, and have held up shockingly well for how cheap they were. We redid our bathroom completely by ourselves a couple of years ago and in my sleep deprived stupor (when you are without a bathtub in a one bathroom house, you stay up late and spend all your free time installing tile) I wore one of my lovlies while grouting. Of course there were spills and I thought I'd ruined it but I couldn't bring myself to throw it away. It lived in my craft room for 3 years until the perfect idea came to me, inspired of course by Pinterest. Oh Pinterest. I do love you so. Note: I get that the damage doesn't look that bad in this photo, but trust me, it was not wearable to anywhere other than Home Depot.
Some white fabric paint, a chop stick, a Trader Joe's bag and an hour later I had this.
I leaned heavily on this girl's work for inspiration. Amazing isnt she? I thought about freezer paper but in the end I just free handed that sucker on there. I did not have the energy or patience to make a stencil and I'm actually kind of glad that I didn't. It has this sort of batik, boho thing going on with the imperfect line work that I'm totally digging and hopefully looks as cool as I think it does. There is a wealth of inspiration out there and this is a great way to cover up any kind of minor staining on a beloved piece.
Showing posts with label Clothes for Me. Show all posts
Saturday, August 11, 2012
Monday, August 6, 2012
A little trip for busy bees
Oof. Pregnancy + toddler is hard work! I've managed to keep sewing, baking and making, but blogging has fallen by the wayside. I don't know how some of these bloggy mamas do it. Those broads are amazing. I've got lots to share so I'll start with our recent little summer vacay.
We decided not to deal with air travel this year and opted for a cabin on the Wenatchee river, only an hour and a half drive from Seattle. What a treat! The weather was great, we were in a little community with a playground and a pool just steps away and Lake Wenatchee was literally a 5 minute drive. We swam, we threw rocks in the river, we sat in the mud, we giggled and sunned. Before we left I did a little vacation sewing. A couple of pairs of maternity shorts for myself, some shorts for Jack and then while we were there, I finished the hand stitching on the next sized bucket hat (I'd already made Jack one in small).
They were all fun projects. For the mama shorts I drafted a pattern using a pair that fit when I wasn't preggo, leaving the fly open to accommodate some extra room in the waist area. I also cut the front extra low and made a simple elastic waist. One pair is thrifted brown corduroy and the other is a Laura Ashley print that I got on clearance a million years ago. Comfortable and easy. For Jack's shorts I did pretty much the same thing, using a pair of shorts that fit him well, I made a pattern and used an old linen shirt and one of Bruce's old polo's for the fabric. The hat is from Little Things to Sew. God I love that book. The patterns are so well written and easy to follow. This hat comes together pretty quickly especially considering how professional the finish is.
We even caught a fish, and what are mini vacations for, if not for getting a little slimy?
Sunday, March 25, 2012
My sorbetto
"I'm accomplishing goals!", she shouted. I really wanted to start sewing for myself more in 2012 so I made this sorbetto top for a couple of reasons. Reason one, silly me, I thought that a blouse would be sooooooooooooo much easier then pants. Reason two, it was free. Reason 3, I had this image in my head of red gingham in the summer. It took me 5 or 6 hours all together. I made this a size 12 but I did mod a couple of things. When copying the pattern, I added about six inches to the length. I did end up taking in the hip area but I should have anticipated that from the beginning since my hip to waist ratio makes me a classic apple shape. Boo. I added sleeves using the free pattern at sew weekly (which needed a mod itself being way too small for me at the first cut). I also added 3 vintage buttons at the pleat to balance my idiotic choice of white bias tape around the neckline. I dunno, its OK I guess. At least its wearable and doesn't look completely home sewn. You can see the darts are a little high on me. I should have adjusted them but after taking in the sides and re-cutting and sewing the sleeves I was kind of done. I've gotten so much better, but I still need to learn to be less lazy with my sewing. Half an hour of adjustments can mean the difference between a well fitting garment that you wear over and over and something that you spent hours making that just sits in your closet, judging you. At least it looks pretty good with stretch trousers and motorcycle boots.
Sunday, December 18, 2011
More handmade gifts: T-shirts for my girls
After I made that dolman sleeve top, both Brenda and Kayla said they each wanted one for Christmas. How flattering! Of course I had to oblige. I picked out some fabric at Jo-Anns about a month ago and got to work. I've been working on these on and off when I had time, amidst other things so the month time frame is really misleading. In total (including pinning at which, for some reason, I am painfully slow) these probably only took a couple of hours each to complete. I adjusted my original pattern slightly by dropping the armpit on both of these. I like the look a lot. The striped one is made from a super stretchy knit that was a nightmare to sew but I LOVE how it came out all drapey. Its really soft and comfortable to wear too. To be honest, I kinda wanted to keep it. The photo makes it look a bit pink, but its actually bright red and navy.
Kayla's was a little less frustrating to sew with but isn't as stretchy so its a bit more structured. I think the cut of it will be so flattering on her. She also got to peek at the fabric before I started and claimed she loved it. I forgot to take a picture before I wrapped it so I'll have to try to get her wearing it.
Kayla's whole present includes the top, a jar of homemade pickles and a little something Jack picked out for his auntie. Brenda will be getting her top and a picture that Jack scribbled just for her. Now, off to the post office! Auntie Brenda's gift has to travel all the way to Australia... if we hurry, it might not be too terribly late.
Wednesday, November 2, 2011
Sweater Refashion: Big Man Sweater to Lady Sweater (a tutorial)
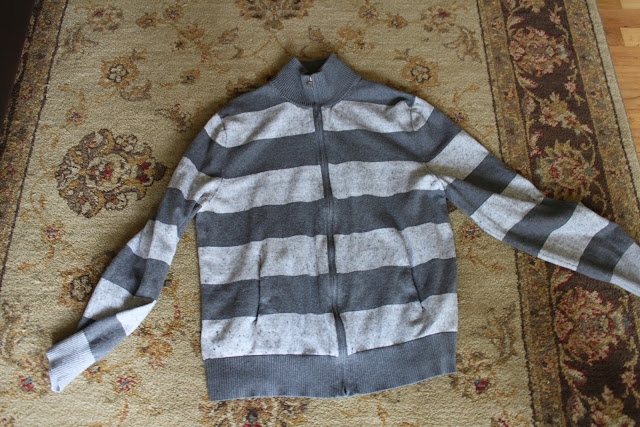
First I hacked off the sleeves. I have kind of long arms and when I realized that the sleeves wouldn't be long enough after taking the shoulder up I decided to make them 3/4. Since I wasn't worried about the length I just went to town. If you want the sleeves to be full length, you might want to be careful here.
I marked where I wanted the shoulders to attach (using the a lady sweater that fits as a guide) and cut the armhole to match.
Next I adjusted the curve of the shoulder to account for the smaller size of the new armhole.
I turned the sweater inside out and pinned down the sides where I thought I wanted to take it in. Note: Since I didn't try it on like this I ended up having to take in more before I sewed on the sleeves. Which is a good reminder. When you are winging something like this... keep trying it on throughout the process.
After you've sewn up the sides, you'll attach the sleeves. This is a perfect project for a knit since the sleeve doesn't have to exactly fit the hole. The fabric is stretchy and you can sort of fudge it, but here's how I pin to avoid major puckers. First, mark the top of the sleeve with it folded in half (I just use a pin). This is not strictly necessary but it will come in handy in a minute here.
Next, with the wrong sides facing, line up the underarm seams and pin.
Then before you start pinning around. Pin the shoulders together at the top using the marker on your sleeve as a guide. This way you'll know you have an even amount of fabric on each side of the opening. Then just start pinning around. You can finesse the fabric in whatever direction you need.
Sew around the opening beginning on the backside of the armpit, so that your back stitch wont show on the front (it probably wont show anyway, I'm just kind of paranoid about messing up the fronts of garments).
And there you go. A super cute lady sweater from a big man sweater.
As you can see, I misjudged the 3/4 sleeve length. However, since I am super lazy, I rolled up the cuffs and it looks just fine. Good enough for me anyway.
Sunday, October 2, 2011
I made a dolman sleeve top (that actually looks good)!
Man I wish I'd made a pattern. I love it! After about 15 failed projects in a row I can't tell you how good it feels to get 2 wins within 24 hours of each other! I've had a version of this top in my head ever since I scored this fabric at the Northshore Senior Center rummage sale in 2010. I knew what I wanted to make, but wasn't ready to cut into it at 8 months pregnant. I've thought about the fabric on and off for the last year and today, I finally decided to just go for it. I've known for a couple months I wanted to do a dolman sleeve because they are so trendy at the moment but also because it's so easy. Less actual sewing is always a good thing. Case in point, exhibit A below.
I took some measurements. I wrote down some numbers. I did some pinning, some folding, some re-measuring and had an inner dialogue that went something like "Hey self! Are you sure this is the right way to do this, remember what happened last time we tried to make grown up clothes without a pattern?" and finally some cutting. Its a pretty basic shape. I had enough scraps left over to make hems for the bottom and both sleeves but in the end I decided to leave the bottom be. I just folded over a quarter inch and sewed. I didn't even pin or measure it. Shhhhh. I added a super simple, 2 inch hem to each sleeve. I think it finishes the top off nicely and gives a simple but fun contrast with the stripes going different directions.
I'm super pleased with how it came out. I think the silhouette is flattering and best of all, I don't think it looks home sewn. I really need some comfortable tops that aren't old navy tank tops or tshirts that say things like "That's quacktastic". I've been spending a bit too much time in yoga pants of late. Momma needs to class it up a notch. Like, jeans... at least a couple days a week. Maybe 2. Yeah 2 days is a good start.
Friday, June 17, 2011
Star spangled tank?
OOf, this week has gotten away from me! I have been very busy doing "house" stuff. Grocery shopping, filing a giant pile of paperwork that's been glaring at me for months, tidying up things (a rats nest of power cords and battery chargers for example) that have regrettably become part of my home decor. These things needed to be addressed, but ignoring all my crafty inclinations left me a little wild. Instead of working on any number of UFOs or starting on something that's been on my to-do list, I made this.
I've been wanting to do something for the 4th but I wanted it to be easy and quick so I might actually get it done on time this year. Inspiration struck today when I thought about all these boring white old navy tanks I have in combination with Dana's kick ass sprinkle technique. It came together over nap time. I put the tank on and marked the spots where I thought stars should go with safety pins. Then I just traced a couple of stars onto the tank with a fabric marker and sewed away. You can still see the fabric marker here. I couldn't wait to wash before I drug Bruce into the living room to take photos.
Easy-peasey! I think this tank will look smadorable with the red shorts I'm dying to make now that I have a working pattern. Keep your fingers crossed I manage to get those done in a reasonable amount of time.
I've been wanting to do something for the 4th but I wanted it to be easy and quick so I might actually get it done on time this year. Inspiration struck today when I thought about all these boring white old navy tanks I have in combination with Dana's kick ass sprinkle technique. It came together over nap time. I put the tank on and marked the spots where I thought stars should go with safety pins. Then I just traced a couple of stars onto the tank with a fabric marker and sewed away. You can still see the fabric marker here. I couldn't wait to wash before I drug Bruce into the living room to take photos.
Easy-peasey! I think this tank will look smadorable with the red shorts I'm dying to make now that I have a working pattern. Keep your fingers crossed I manage to get those done in a reasonable amount of time.
Monday, June 6, 2011
I made shorts!
Yes, I did. And I'm very puffed up and proud of myself. Ever since I started making pants for Jack, theres been a little seed in my brain about shorts for myself. I have kind of a weird shape. I've always been thick wasted with skinny legs. Pants that fit my waist are saggy in the butt and pants that look great on my rear end wont button up. Its super annoying and something that's always had me interested in sewing for myself. Well with my new understanding of pant construction, I decided to draft a pattern and make a muslin today. It was so flipping easy I don't know what I was waiting for. I did mis-measure the waist at first pass. I tried them on the first time and couldn't pull them past mid thigh. But with a cheap, busy quilting cotton like this, it was an easy fix. I just added a couple of panels to the sides.
Its barely noticeable. The waist is elastic. This is not only very comfy and forgiving on my post partum body but also way less scary than a zipper. I just made shorts that I might actually wear, gimmie a break! The version I've had in my head is cuffed so I tried that out here. Figured I may as well nail down the details while I was messing around. It worked out really well. I just added 4 inches to the hem before cutting the fabric and hemmed the shorts with 3" pressed under. Then I just folded 2.5" back up and pressed again.
I really dig the little button tabby detail that seems to be everywhere right now, so I found some cute contrasty buttons and sewed these arrow bits. I'm super lazy so there's no button hole or anything. I just looped the arrow over the cuff and sewed the button on through all 3 layers. The entire project took 1 nap and one mum mum cracker (about 2 hours). That includes drafting the pattern, realizing I had messed up, unpicking 2 hems, and resewing up the sides. I am really excited to adjust the pattern and try it out on some better fabric. I have some red cotton that I can actually hear singing to me from the next room, ooo and some gray canvasey stuff. The possibilities are endless. I leave you for now with this snap of Jack. Lookit those eyes ladies! Ahhh my beautiful little boy. Its been a very good day.
Update: Squeee! These shorts have been featured on Sew Woodsy and I'm feeling all fuzzy about it. It's a fantastic blog, head on over and check it out!
Tuesday, July 20, 2010
Summer skirt
I've had this one bouncing around in my head for some time. Ever since I saw Kate Hudson in this, I've wanted to try my own version. So, in honor of de-stashing, here it is. My preggo summer skirt.
Ive found modesty a bit of an issue in later pregnancy. My belly is so big that I often feel like that fat guy at the comic book store with the bottom of his tummy hanging out of his "han shot first" tshirt, or I find skirts and shorts too short and tight for my growing thighs/tummy and the unladylike way I have to bend over now. I'm thinking this skirt is a pretty good solution. It's long enough that I can bend over any which way I need to without flashing anyone, and its nice and loose and comfy at the waist. I made this one the same way Ive been making all my skirts for the last year or so.
Step 1: Embellish however seems appropriate.
Step 2: Sew a hem if necessary.
Step 3: sew your fabric into a tube.
Step 4: Fold over the top (unhemmed bit) and sew at the edge to form a casing for your elastic, leaving a gap to thread the elastic through.
Step 5: Measure your waist with said elastic by stretching until it is tight enough to hold a skirt up but is still comfy (remember the fabric of the casing will add a little bulk).
Step 6: Thread elastic through the casing using a safety pin or if you are lazy like me, a broach back you found in a jar on your sewing table.
Step 7: Sew edges of elastic together making sure to back stitch a couple of times so its secure.
Step 8: Put on your new skirt and congratulate yourself for being so thrifty and clever!
As you can see, its pretty freeking easy to have a new skirt with a minimal time commitment. It gets faster as you go along as well. This one probably took me an hour because... gasp, I actually ironed the fabric first and I had to sew all these rows of lace on, but I bet once you get this down you could throw one of these puppies together in 15 - 20 minutes. This method scales really well too... its so easy to make one in any size since you aren't using a pattern. Make one for your daughter, bfgirlfriend or doggie. The possibilities are endless!
Monday, June 28, 2010
Refashunz
I finally did it! I don't even know how long this pink tshirt from forever 21 was hanging from the light fixture in my craft room (originally put in such an awkward place in a failed attempt to get me to move forward on my vision for it sooner rather than later). But here she is and I couldn't be more pleased. All it took was Mae coming over, several cups of half/caf coffee and an over indulgence of home made pumpkin scones. Mmmm pumpkin scones. I digress, back to the shirt!
I used this tutorial from Lex that Ive been drooling over forever (isn't she amazing?) and modified it to fit the materials I had on hand. I used an ill fitting old navy tshirt for the flowery bits and collar. I'm so pleased with how this came out. I'm almost inspired to tackle the blue version of the same tshirt which is now occupying most of the space on my dining room table. See, if its all spread out, perhaps Ill get to it sooner... we've been down this road before haven't we?
Subscribe to:
Posts (Atom)


